How to install eSIM on iPhone manually (SM-DP+ Address)?
Before you begin, please make sure your iPhone:
- Supports eSIM (see What phone devices support eSIM?)
- Is fully carrier-unlocked
- Has a stable internet connection (preferably Wi-Fi)
Step-by-step Guide
-
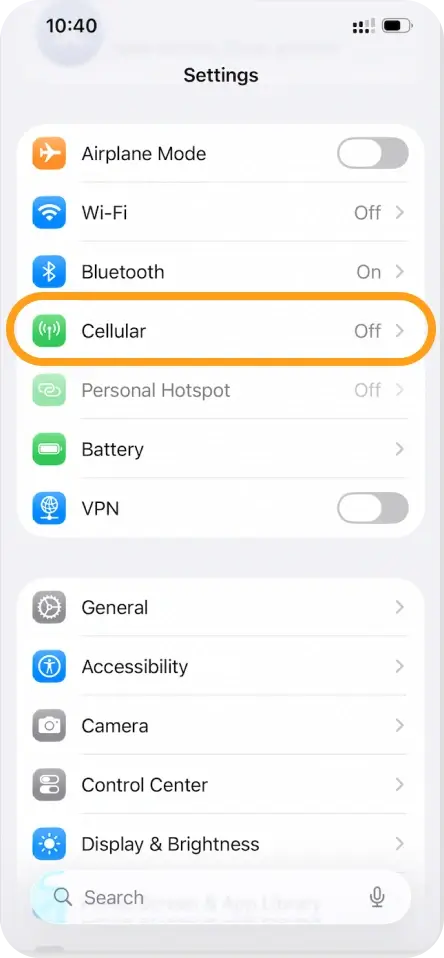
Open Settings on your iPhone.

-
Tap Cellular (or Mobile Data).
-
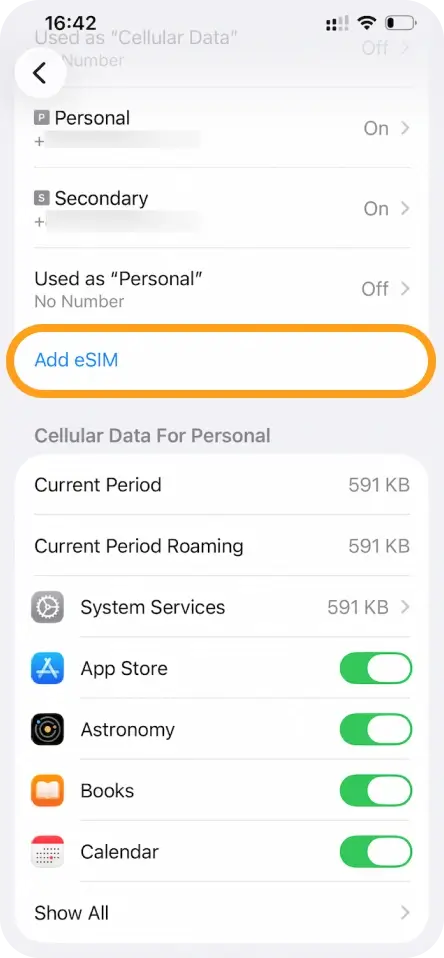
Select Add eSIM.
-
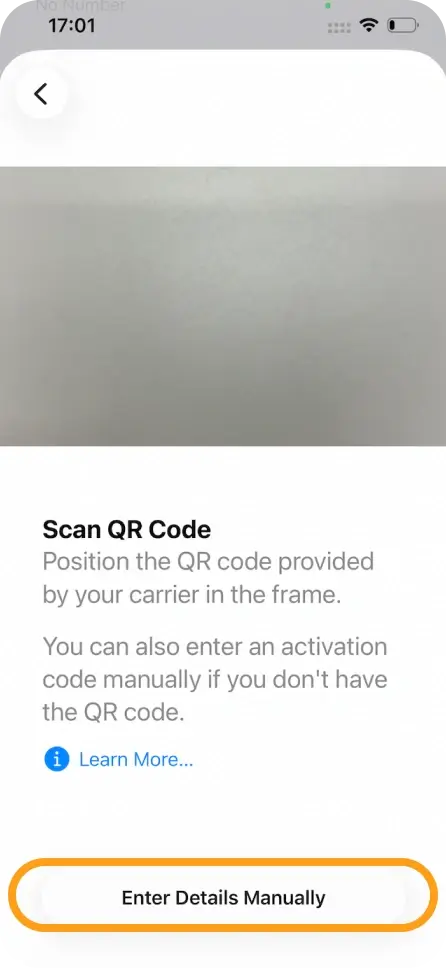
Tap Use QR Code, then choose Enter Details Manually at the bottom.
-
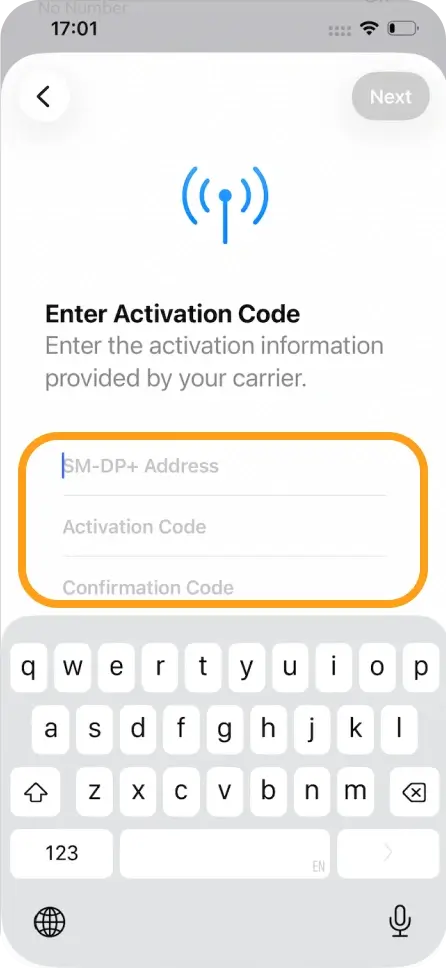
Enter the SM-DP+ Address provided.
-
Enter the Activation Code (if required).
-
Tap Next and wait for the eSIM to activate.
-
Once activated, follow the on-screen instructions to complete the setup.
After Installation
- You can set the eSIM as your primary or secondary line.
- Enable or disable the eSIM anytime under Settings > Cellular.
- It’s recommended to label your eSIM (e.g. “Travel eSIMNum”) for easy identification.
Troubleshooting Tips
- If activation fails, please double-check the SM-DP+ Address and Activation Code for accuracy.
- Make sure you are connected to a stable network during installation.
- Restart your iPhone and try again if the process is interrupted.
- If the issue persists, please contact our support team with a screenshot of the error message.
Important Notes
- Each eSIM can only be installed on one device.
- Do not delete the eSIM after installation unless instructed, as reinstalling may not be supported.
- Manual installation is usually recommended only if QR code installation is unavailable or fails.